Tutorial Assets
The following assets were used during the production of this tutorial.
Step 1
The first thing we’re going to do is create our background. Create a new document, ours is 1920 x 1280, and unlock the background layer.
It doesn’t matter what color it is, because we are going to override that color using layer styles.
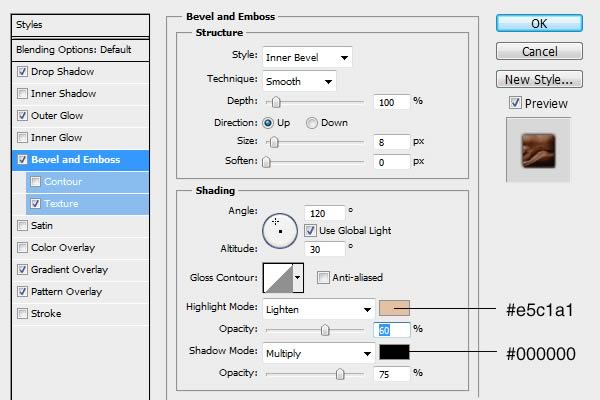
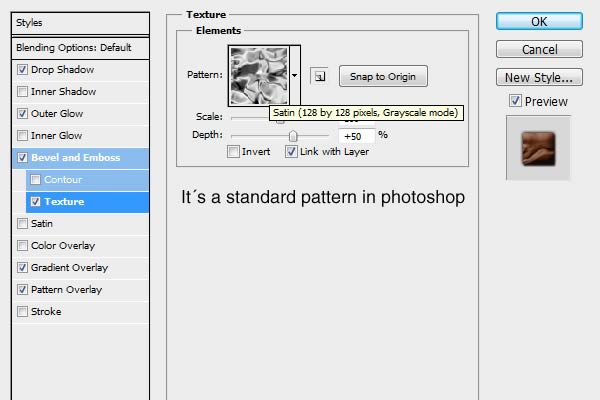
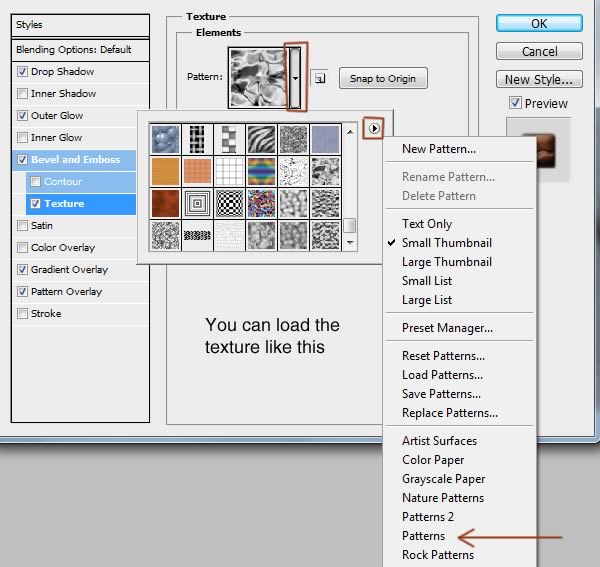
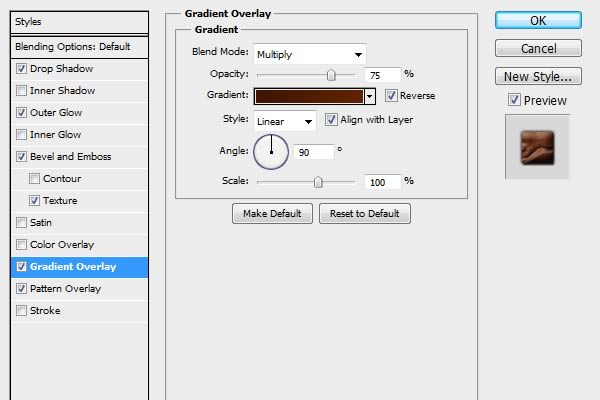
Double click the name of your background layer in the Layers palette to open the layer styles dialog box. Apply the following layer styles settings, using a medium red to dark red gradient for the Gradient Overlay.
You should end up with something similar to the image below.
Step 2
Using the pen tool, draw a black shape with a jagged line across the top as a new layer. This shape is going to be used to simulate the reflection of mountains in the distance.
Step 3
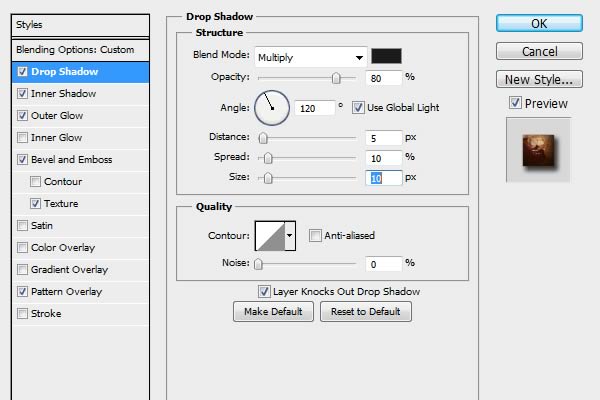
Change the Fill to 0% in the Layers palette, and apply the following layer style settings.
You should end up with an image similar to the one below.
Step 4
Create a new layer and fill it with white. With your new layer selected, Command/Ctrl + Click the vector mask icon for your mountain reflection shape in the Layers palette to make a selection of your shape.
Press Delete to delete that portion from your new white layer, leaving you with the image below.
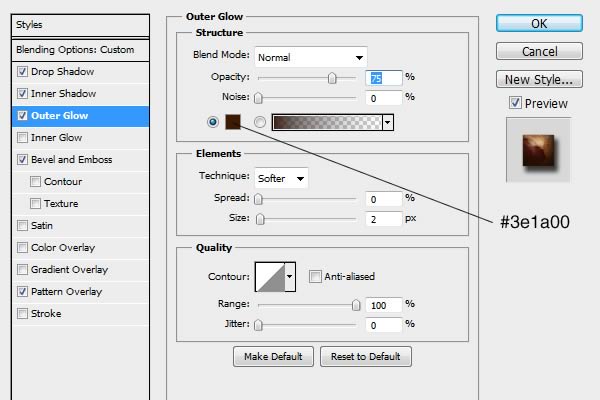
Set the fill to 0% in the Layers palette and apply the following layer style settings to achieve the result below.
Step 5
Now that we have a nice reflective, red car paint effect, it’s time to create our emblem.
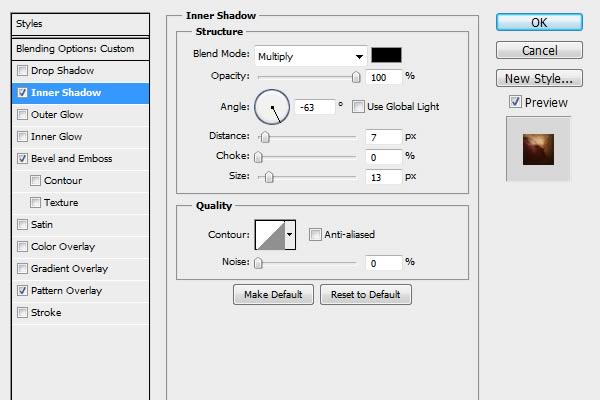
Draw an oval shape using the Ellipse tool, set the Fill to 0% in the Layers palette, and apply the following layer style settings to achieve the result below. The Inner Shadow effect will be used to simulate the shadow of our chrome border when we create it later.
Step 6
Duplicate your oval layer, clear the layer style settings, set the Fill to 0% in the Layers palette, and apply a black outer stroke of 25px.
Right click the layer in the Layer palette and click Convert to Smart Object. This will allow us to style the stroke as a shape, while giving us the ability to edit the thickness later on.
Step 7
Apply the following layer style settings to your newly created Smart Object to give it a chrome effect.
Step 8
Next we will create a mountain shape to reflect within our oval.
Create a new layer without anything in it. With your new layer still selected, Command/Ctrl + Click the thumbnail of your Oval shape in the Layers palette to make an oval selection. Next, Command/Ctrl + ALT + Click the white layer you created as a negative of your original mountain shape. This will subtract that shape from your selection.
Fill your selection with black and apply the following layer style settings to achieve the result below.
Step 9
Duplicate your oval shape, clear the layer styles, and move it above all the rest.
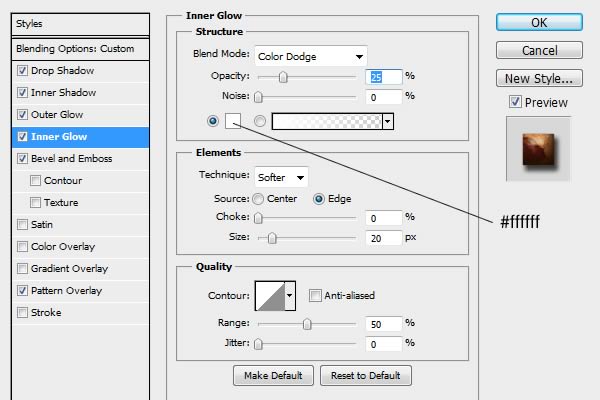
Set the Fill to 0% in the Layers palette and apply the following layer style settings for some subtle lighting effects.
Step 10
Duplicate your top oval shape and clear the layer styles.
Set the Fill to 0% in the Layers palette and apply the following layer style settings for one last shadow effect.
Step 11
Now for the star of our show.
In order for this retro effect to work, you need a retro style typeface.
Create your text and apply the following layer style settings for a chrome look.
Step 12
Next we will create our checkerboard pattern.
Create a new document that is 200 square pixels with a white background. Draw two, 100 pixel black boxes and place them in the upper left corner, and lower right corner.
Press Command/Ctrl + A to select your entire canvas and click Edit > Define Pattern. Name your checkerboard pattern and click OK.
Step 13
Switch back over to your main document.
Draw two, 100 pixel tall strips across the top and bottom of your canvas.
Apply the following layer style settings, using our checkboard pattern for the Pattern Overlay.
Final Image
That’s it! Using some simple selection tools and Photoshop layer styles, you now have your very own retro chrome emblem.


