
Create a Portrayal of a Human Transitioning Into a Statue

You will find lots of tutorials that explain how to turn a person into a statue in Photoshop. In this tutorial, however, we will put a new spin on this idea and will explain how to portray a scene of a human actually turning in to a statue. This tutorial will use a photo of an actual statue as a base and then show how to make the statue look more human, instead of the other way around. Let’s get started!
Tutorial Assets
The following assets were used during the production of this tutorial.
Step 1
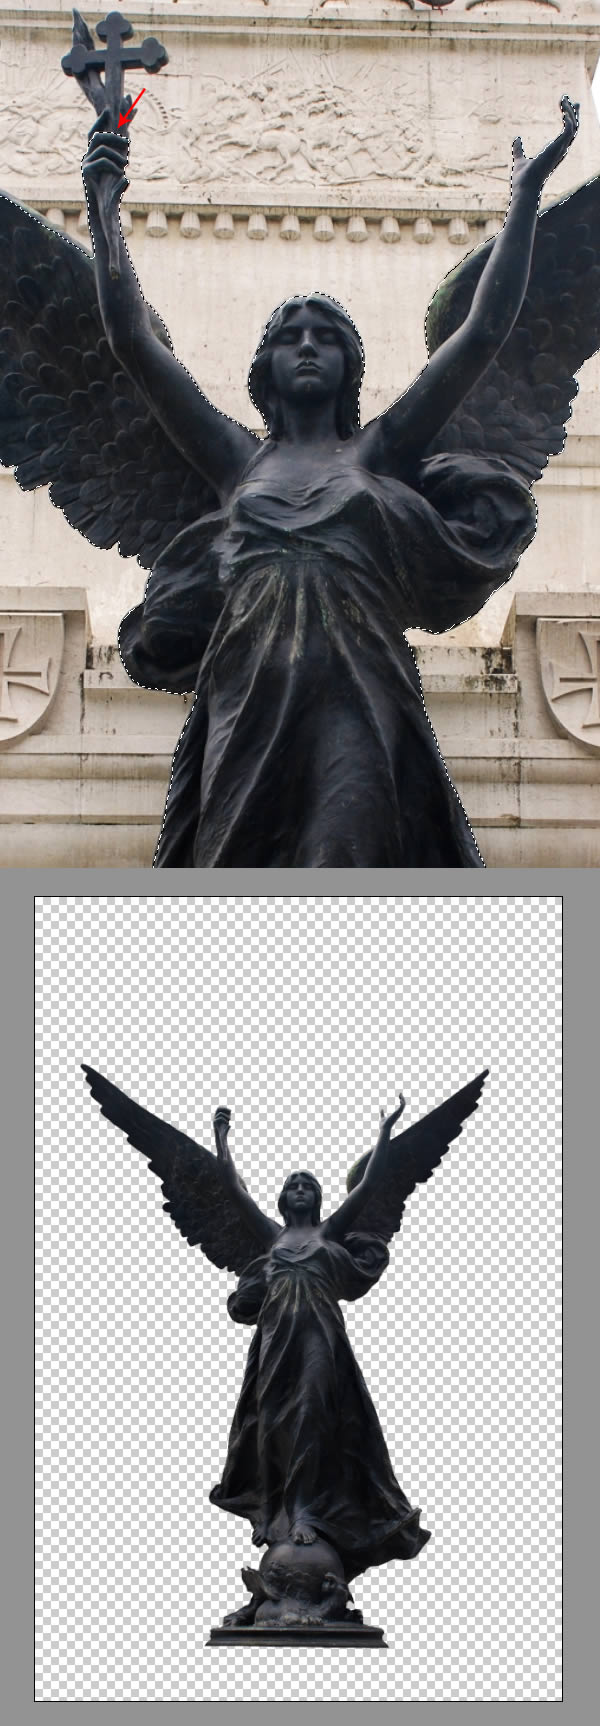
Start by opening the image of statue. We’ll work in its original canvas so all you need is just unlock the background layer by double-click on it. Then use Pen Tool and start extracting the statue, then delete the background around.
I wanted to make this piece more neutral so I cut out the cross in her hand, as it was much of a religious character.
Step 2
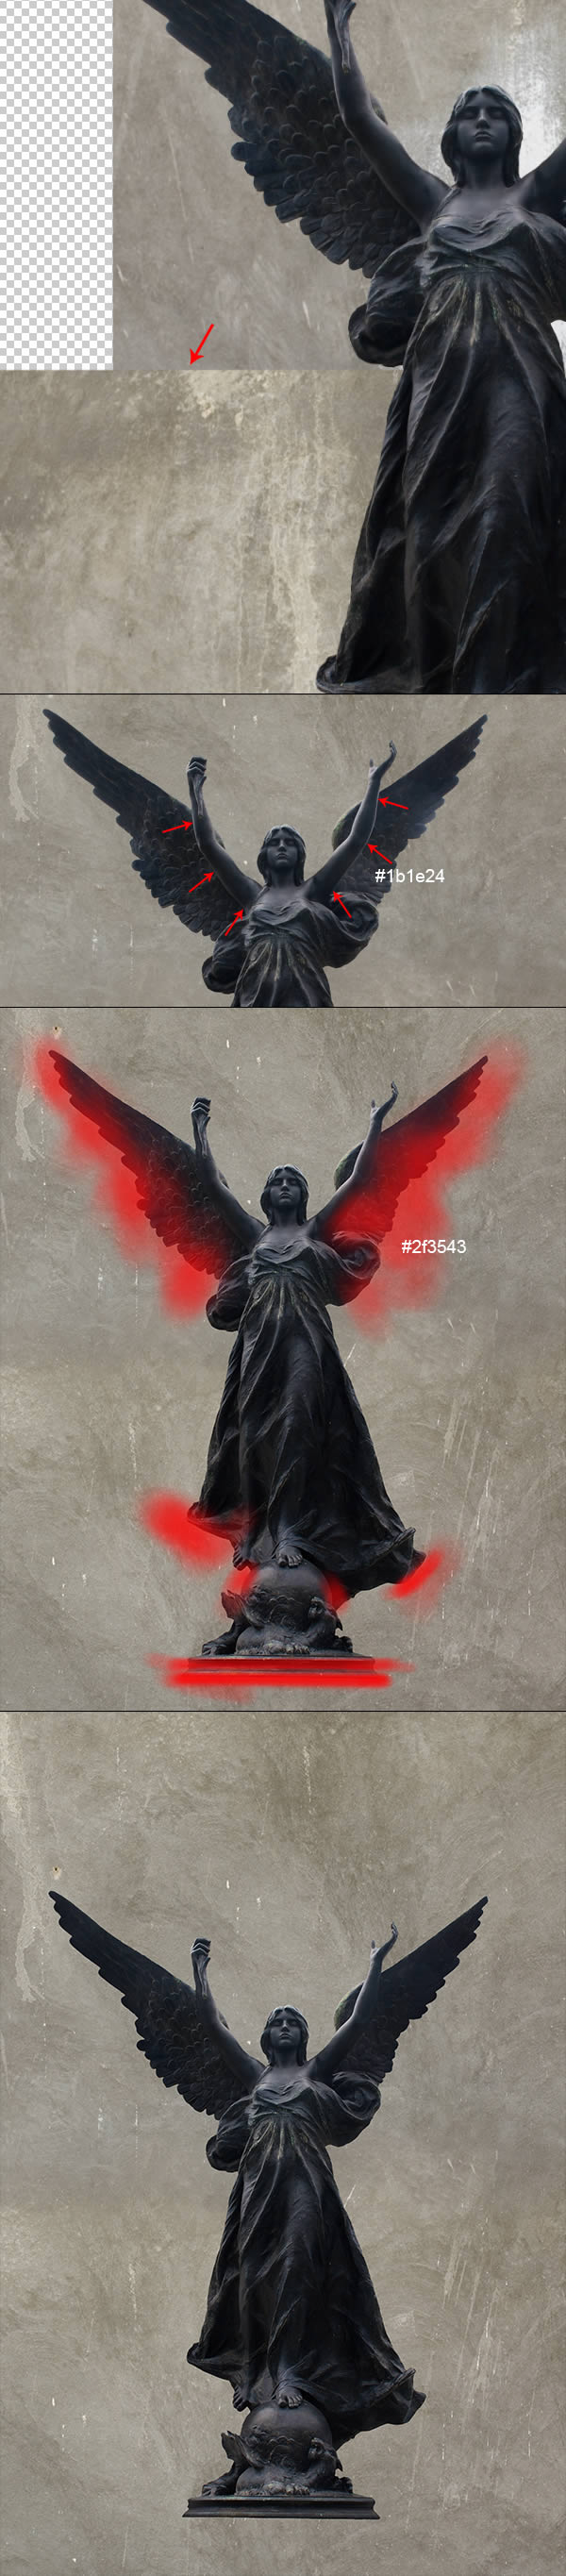
Next open the Plaster Bare texture and place it behind the statue. You might need to construt the background a little bit with these textures, as they are not quite big enough to cover the whole canvas (1st image below). To do this duplicate this texture few times (2-3) and spread it all around to cover the blanks. Then use soft Eraser (E) to make the transitions smoother (1st image below).
Now create new layer above the Statue layer, hit Alt + Command/Ctrl + G for Clipping Mask, use dark blue color and paint with tiny soft brush (Diameter of 2-3px) to cover the edge lights from the indicated side of arms. Next create another new layer above, clip it with Alt + Command/Ctrl + G, change its Blending Mode to Multiply and use soft brush of blue color to paint as indicated (3rd image below). We need to darken the bottom part of each statue element that seems too bright.
Step 3
Now let’s add some depth. Grab this plaster texture again, hit Command/Ctrl + T to Free Transform, select distort and tighten the texture that it looks like a floor (1st image below).
The textures are the background layers so they should be kept below the "Statue" layer. Now again, below "Statue", create new adjustment layer – Gradient Map, throw the gradient colors as showed in the 2nd image below, then change its Blending Mode to Hard Light. Then use soft white black and paint on the mask as showed (3rd image below). By hiding the mask with brush, we’re now casting light from the top to the bottom, and this is the main light source we’ll be using in this image. Be accurate with this, you should get similar results as mine in 4th image below. If it doesn’t look good, give it another shot and refer to how I painted on the mask in 3rd image below.

Step 4
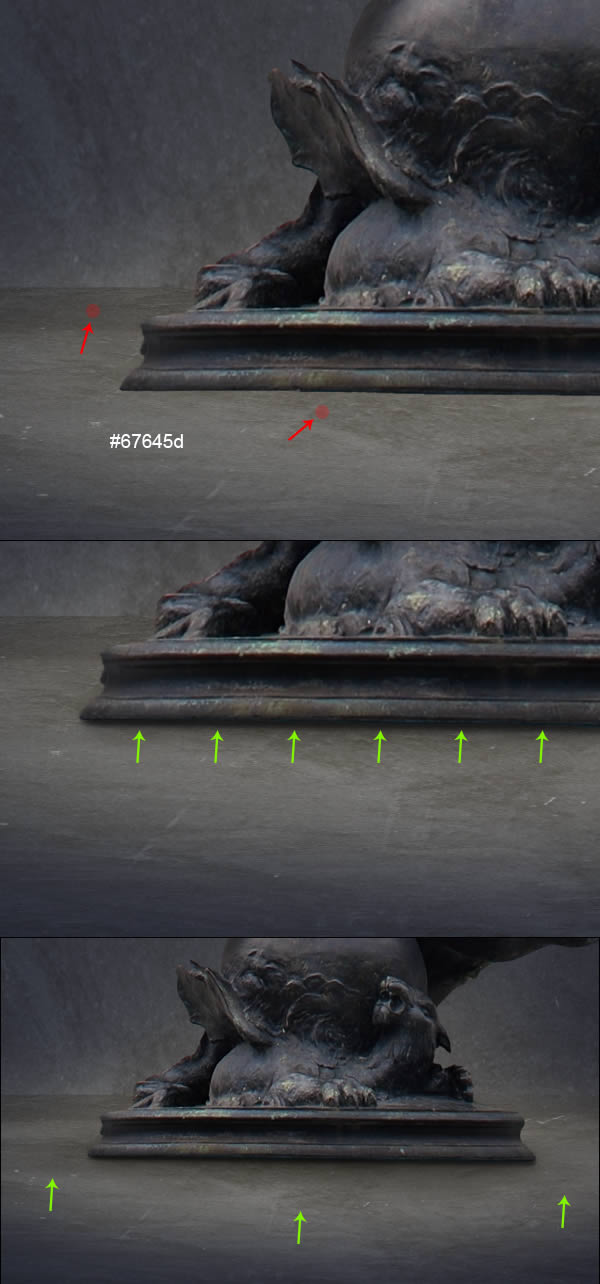
Next, create new layer above background layers (below statue) and change its Blending Mode to Multiply. Grab Brush Tool (B), make it soft, then hold Alt (Eyedropper) and sample color from the indicated spots (1st image below). Then gently paint under the statue to create shadow. Try to make it as thin as possible (2nd image below) and keep it very close to the statue. Repeat this step using slightly brighter tone and this time spread the shadow more (paint it a little bit further from the statue), as indicated in 3rd image below.
No comments:
Post a Comment