
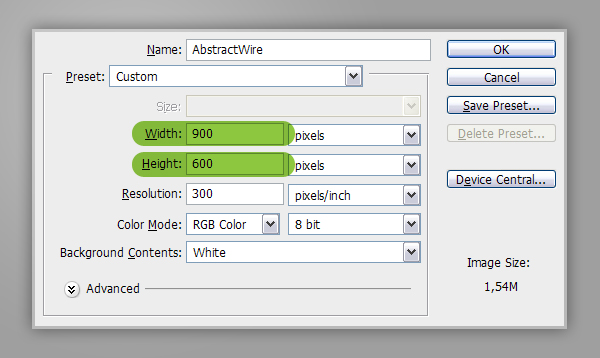
Step 1
Let’s start by creating a new document which is 900 px wide and and 600 px high at a resolution of 300 pixels/inch. Make sure the Color Mode is set to RGB.
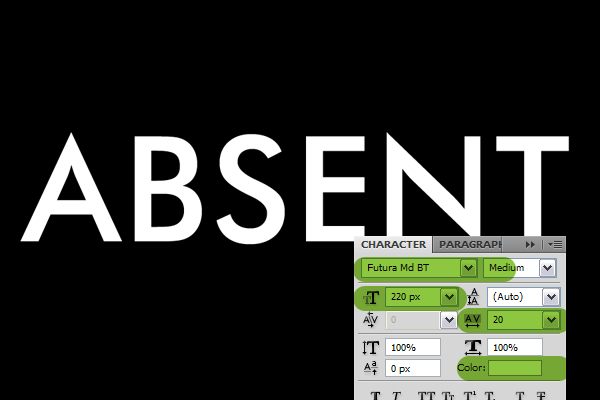
Step 2
Fill the “Background” layer with Black. Get the Type Tool and type your text. I wrote “ABSENT”. I used Futura Md BT font, set Font Style to Medium and Font Size to 220 px. I also set the Tracking to 20 to increase the space between letters. Make sure the Text Color is set to White.
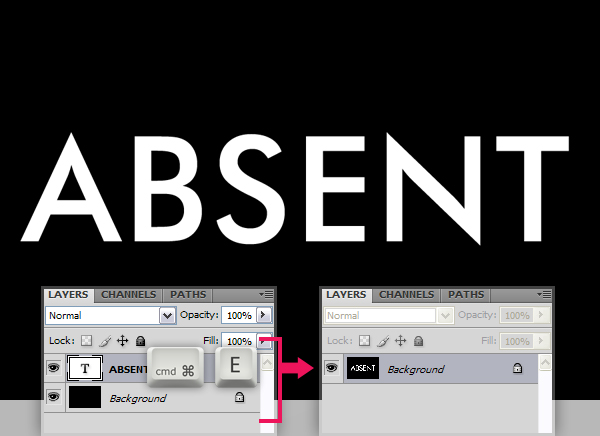
Step 3
While the text layer is selected on the Layers Palette, hit Command/Ctrl + E to merge the text and the "Background" layers.
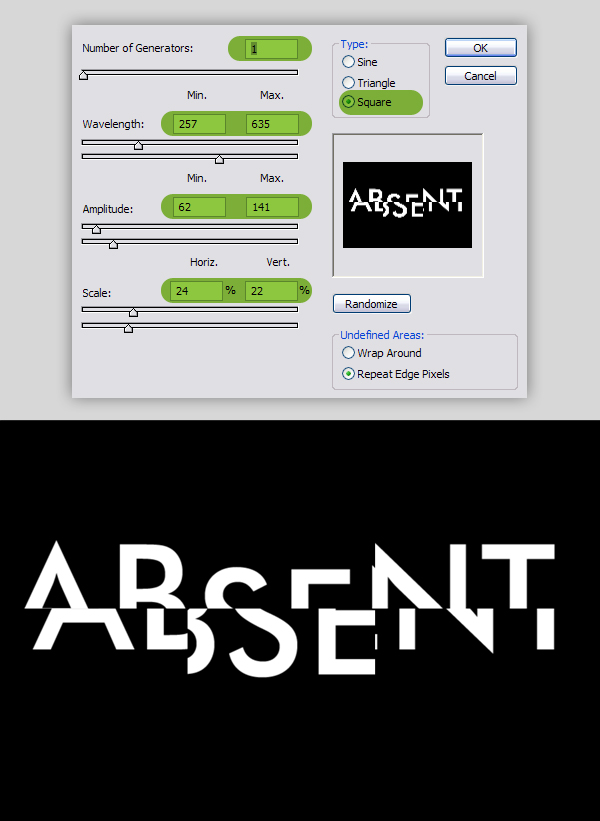
Step 4
Now go to Filter > Distort > Wave and use these settings: Type: Square, Number of Generators: 1, Max Wavelength: 635, Min. Wavelength: 257, Max. Amplitude: 141, Min. Amplitude: 62, Horiz. Scale: 24% and Vert. Scale: 22%. Now you’ll have a pretty distorted text. Please keep in mind that the result depends on these parameters as well as the size, tracking and position of the text.
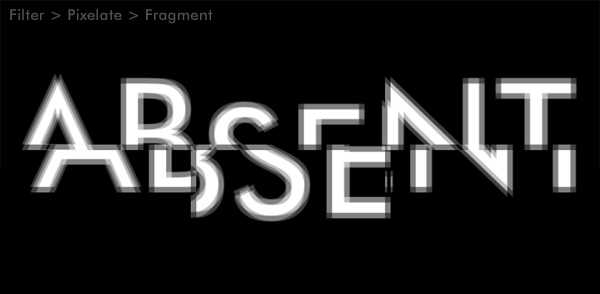
Step 5
We’ll add another displacement effect to our text and we’re going to use Fragment filter for that. Go to Filter > Pixelate > Fragment.
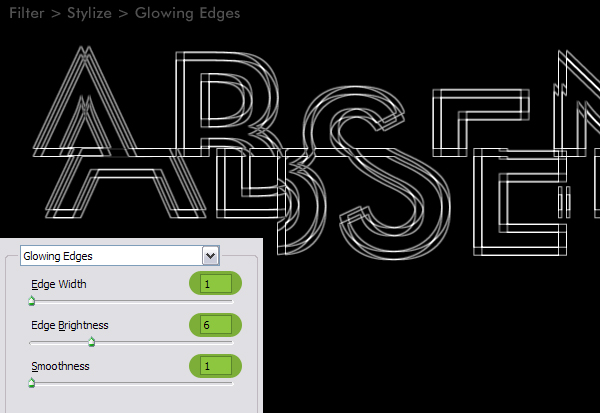
Step 6
Now go to Filter > Stylize > Glowing Edges, set Edge Width to 1, Edge Brightness to 6 and Smoothness to 1.
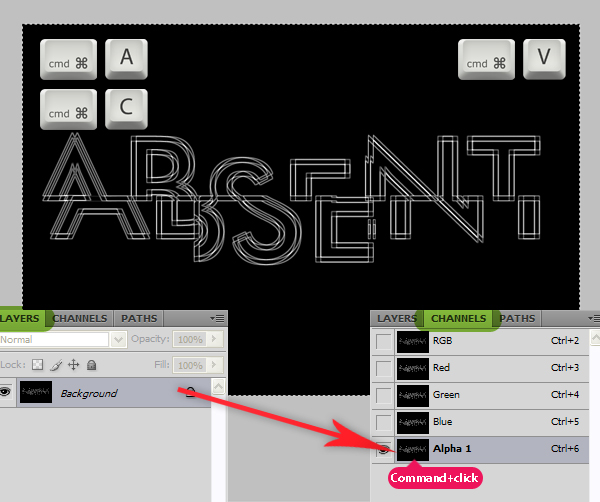
Step 7
We’re going to copy this image to a new alpha channel and make a selection out of it. First hit Command/Ctrl + A to select the whole layer, hit Command/Ctrl + C to copy. Then go to the Channels Panel create a new channel and hit Command/Ctrl + V to paste. Command/Ctrl-click on the Alpha 1 channel thumbnail to get the white pixels selected.
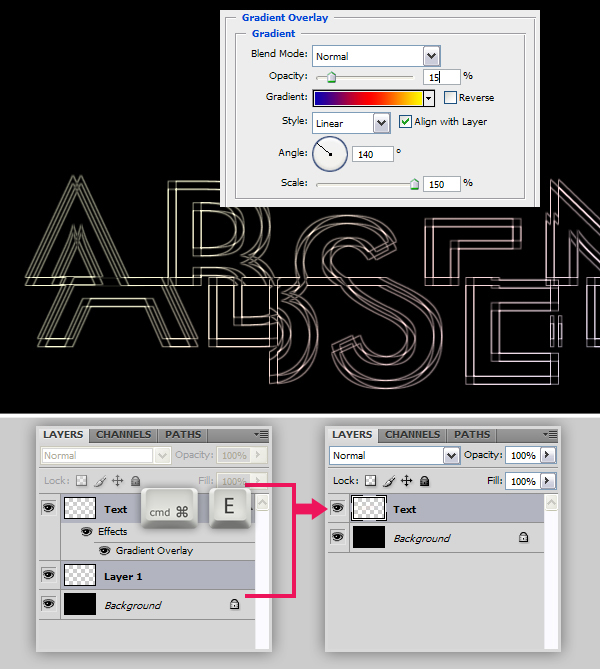
Step 8
Now go back to the Layers Panel. Create a new layer and name it "Text". Fill the selection with White, hit Command/Ctrl + D to deselect. Go to the "Background" layer and fill it with Black. Now we’ll apply a Layer Style to "Text" layer. Select the "Text" layer in the Layers Panel and apply a Gradient Overlay using these settings: Blend Mode set to Normal, Opacity set to 15%, Gradient set to Blue, Red, Yellow, Angle set to 140 and Scale at 150%. Select the “Background” layer in the Layers Panel and create a new layer. Select both “Layer 1″ and “Text” layers, hit Command/Ctrl + E to merge selected layers. Now the layer style we’ve just applied is merged with the layer.
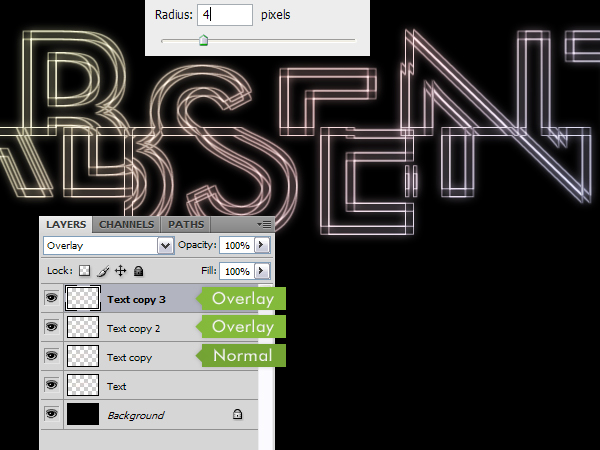
Step 9
It is time to add some lighting effects now. Duplicate the “Text” layer by hitting Command/Ctrl + J. Go to Filter > Blur > Gaussian Blur and apply with a Radius of 4 pixels. Hit Command/Ctrl + J again to duplicate the “Text copy” layer. Set Blend Mode to Overlay and hit Command/Ctrl + J once again to duplicate the “Text copy 2″ layer.
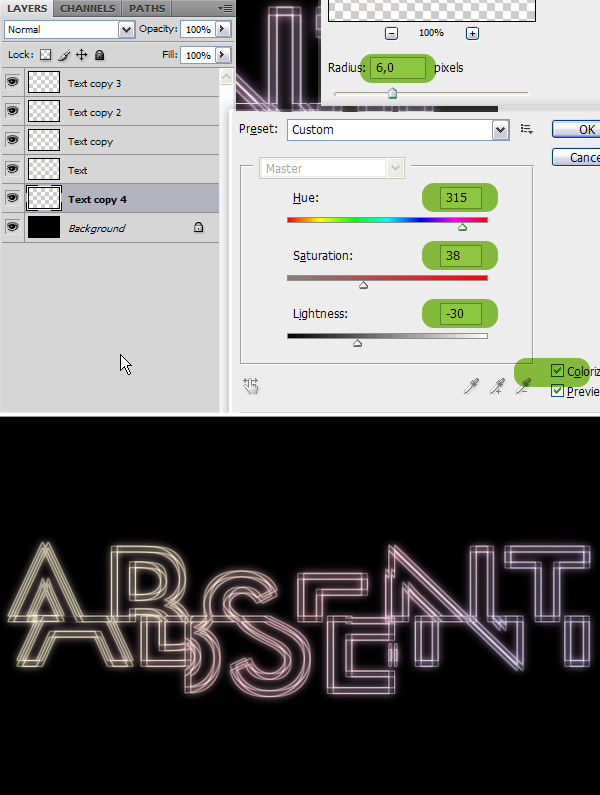
Step 10
Select “Text copy” layer in the Layers Panel and duplicate it. Drag the “Text copy 4″ layer just above the “Background” layer. Go to Filter > Blur > Gaussian Blur and apply with a Radius of 6 pixels. Then go to Image > Adjustments > Hue/Saturation and use these settings: Colorize: Checked, Hue: 315, Saturation: 38 and Lightness: -30.
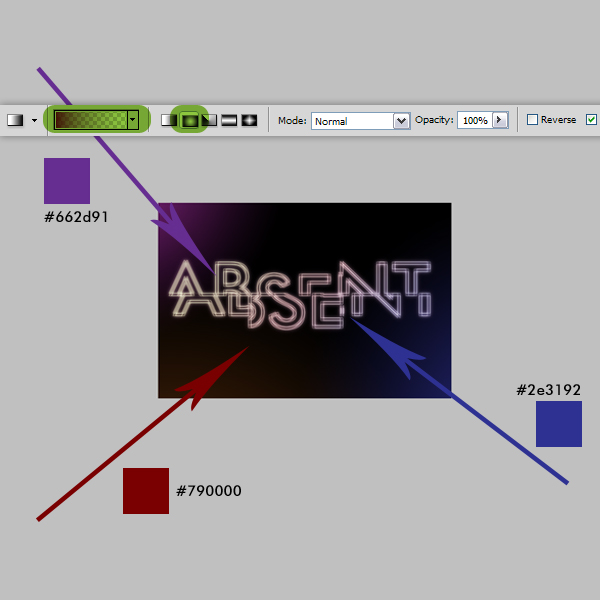
Step 11
Now we’ll create the background. Create a new layer above the “Background” layer and name it “Lights”. Get the Gradient Tool, pick Foreground to Transparent and set to Radial Graident. Zoom out and apply gradients starting from outside the canvas as shown in the below image. You can use the colors shown below as well as you can pick your own.
Step 12
Create a new layer above the “Lights” layer and name it "Circles". Get the Brush Tool, pick one of the standart round brushes and open the Brushes Panel and change the settings as shown below.
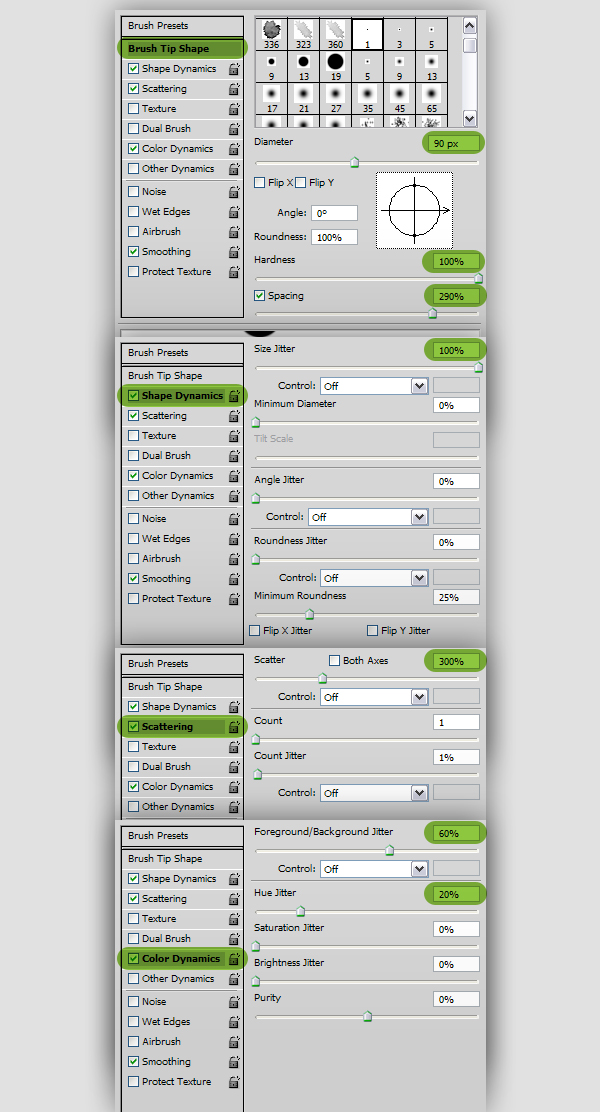
Step 13
Set Foreground Color to #3fc5c6 and Background Color to #ad4cb1. Paint the "Circles" layer with random brush moves.
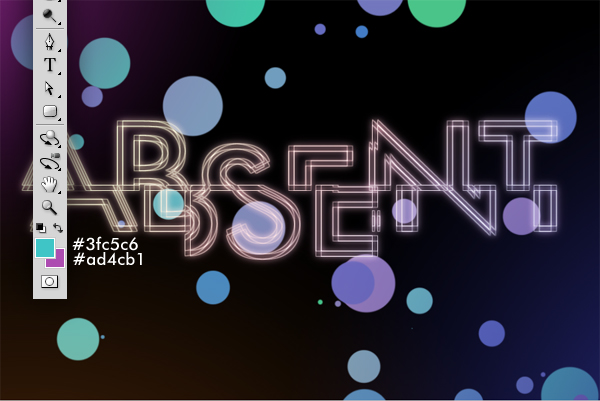
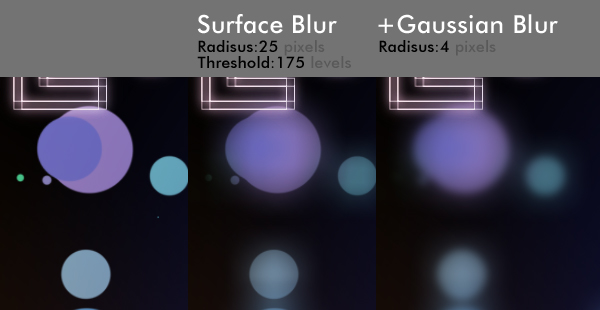
Step 14
Now go to Filter > Blur > Surface Blur, set Radius to 25 pixels, set Threshold to 175 levels and apply. Then go to Filter > Blur > Gaussian Blur and apply with a Radius of 4 pixels.
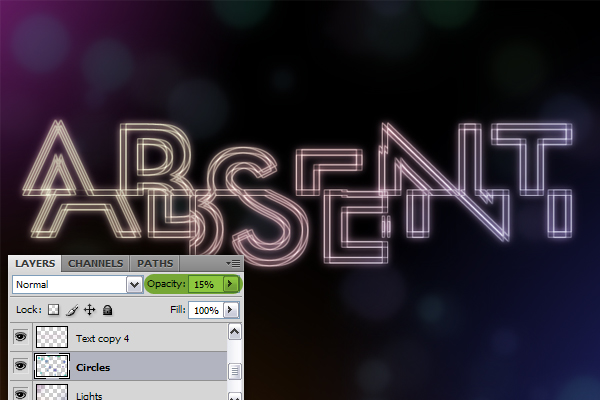
Step 15
Set the Opacity of the “Circles” layer to 15 and this is what we have so far.
Step 16
Finally, we’ll add some text to our design. I placed a clear "ABSENT" text and a subhead text using the same font we’ve used before.
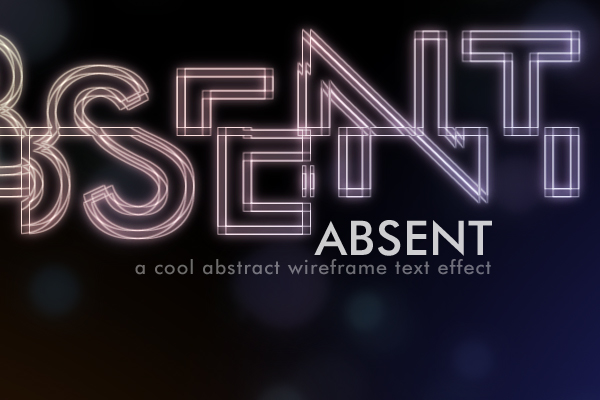
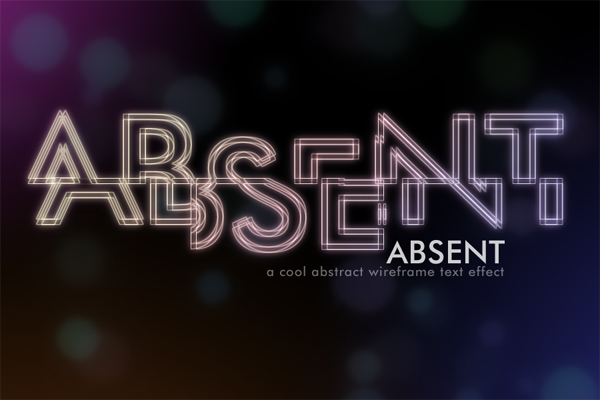
Final Image
Here is the final image. I hope you liked this tutorial and the techniques you learned will come in handy for your own designs.
Further Suggestions
You can try combining multiple text in one design, or experiment different fonts, dingbats and layer styles and get great results.

No comments:
Post a Comment